We made wool felt recently using wet felting techniques and I was surprised and very happy with the results. I've always put 'Wet Felting' into the way to hard - way to time consuming - way to many things required basket. But on a 38C day when it was impossible to leave the house (again!) without being scorched and the youngest was asleep I decided we were gonna give it a go, the easy way, and not expect amazing results, and to my delight an hour later we had three pieces of felt hanging up to dry. One each made by my three and four year olds and one by me.
I thought we must have fluked it, but we repeated the process a few days later and the results were even better. I'm not sure where I got my unfounded fear of wet felting from. I had always assumed that it was something I would have to maybe attend a course to gain the secret techniques required to get wool fibers to bind to each other. So I'm going to let you in on our method, maybe it really is as easy as all that. I would love to know what you think.
Sorry I didn't take photos of every step, as really I didn't expect it to work! But If I'm not clear here or you need a better explanation of any of the steps, I'll be happy to oblige.
1) Tease out your roving into almost transparent layers.
2) On a piece of bubble wrap, bigger than the length of your roving, bubble side up, place a layer of wool with the fibers going left to right.
3) Place a layer of wool with the fibers going top to bottom on top.
4) Repeat steps 2 & 3.
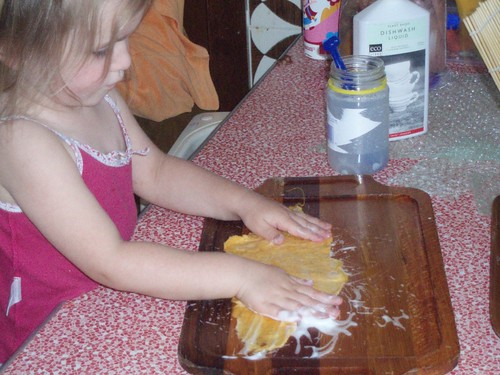
5) We used a mix of dishwashing liquid (eco store brand) and hot water and sprinkled it on top of the wool.
6) Place a layer of bubble wrap on top. Bubble side down.
7) Sprinkle more hot soapy stuff on top and start rubbing, gently at first and all the way out to the edges.
8) Rub Rub Rub, use your knuckles, give it 5 minutes or so and lift the bubble wrap to check your progress.
9) Turn the bubble wrap sandwich over and rub the other side.
10) When it is ready to pick up in one piece (ie - it sticks together) give it a rinse under the cold then hot tap.
11) Using a sushi mat roll the felt out, like sushi a few times.
12) Put the felt back on the bubble wrap, sprinkle with some more soapy stuff , this time use your fingers to rub rub rub.
13) Rinse and roll again
14) Repeat steps 12 & 13 until you have the desired felt quality.
The more suds the better as far as the girls were concerned! And this seemed to work brilliantly it was when they ditched the bubble wrap sandwich and started using their fingers directly that the felt really started to shrink and come together. They could have done this all day, I think. I gave them a tub of hot water and they rinsed their felt out and then soaped it up again and rubbed, slapped between their hands to 'shock' the fibres as my four year old reminded me . . haha!
I will definitely repeat this with the kids, we made little Molly Chicken inspired pins and an needle book with our felt. This is also something that I feel you could do at a kids party for 4/5 year olds. Its got water, bubble wrap, sushi mats - the works. I will also definately repeat this myself. Good quality felt is expensive, so if you can get cheap roving, dye it and make your own felt at home, exaclty the colour you want it - well, everyones a winner.

Monday, 15 February 2010
Handmade Wool Felt
Subscribe to:
Post Comments (Atom)
No comments:
Post a Comment
Hi there and thanks for stopping by to leave a comment.
I love reading them and I'll try my best to respond right here.
Much love,
Dee