Today was the first day of spring. It was wet and cold in Melbourne. (Typical!) Do you know
The Story of the Root Children by
Sibylle Von Olfers? Its a favorite at our place. I had these little root children, Bluebell and Buttercup ready for my girls to discover in the garden in morning, but it was too wet and cold to hide them out there, so they found them on the nature table instead. Here's a tutorial on how I made them.
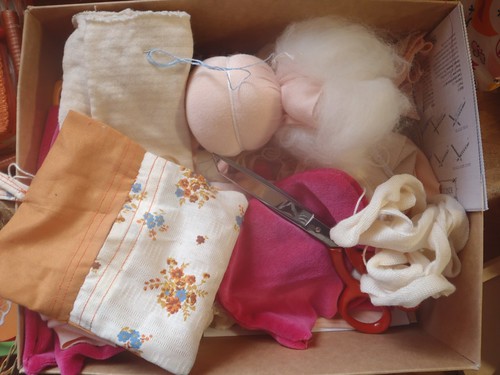
Supplies
wooden doll body (I got mine at Winterwood)
cotton pipe cleaner 5/6cm
circle of flesh tricot/t-shirt cotton - 4cm diameter
rectangle of tricot/t-shirt cotton - 6.5 x .5cm
elastic band
strong crochet cotton
scraps of wool felt
scraps of wool roving to match.
embroidery thread
Start with the circle of tricot and cover the head of the wooden doll. I used an elastic band to tie this off around the neck and then pulled the tricot taut all the way around so that there were no creases at the neck.
Once you are happy with this tie it off again using the crochet cotton. Then snip the elastic band off. This is the easiest way I have found of creating a crease free evenly covered head.
Using the rectangle of tricot create a casing for the arms of the doll. Fold in the ends into the middle leaving a gap at the center. Use back stitch to sew along the edges. Flip the casing so that the right side faces out.
Fold the ends of the pipe-cleaners in a 1/2 cm or so to round of the pointy wire bits then insert the pipe cleaner into the casing. Sew these pipe-cleaner encased arms to the body at the fabric that is sticking out from the head. This is the how mine looked from the back.
Now its time to dress your little root child and give her some character. Cut yourself out two wee dresses according to the picture below. They don't have to be perfect, you can adjust as you sew the dress on. Embroider on a flower if like just keep in mind that you may need to adjust the length and width of the dress.
Hold your two dresses front and back together, right sides out and starting at the left hand shoulder use blanket stitch to close the shoulder seam. Hold the dress on your doll and close the right shoulder seam. Trim any excess felt from the width and length of the body and close the underarm and side seams.
To give your doll hair, tease out about 6cm of roving. You can fold this in half and attach it to the center of the head at the fold using back stitch. I used a scrap of green felt to make a little headband and sewed this to the hair and head all the way around.
Hide in the garden to be discovered (if its not wet and cold!)